Connecting your Shark robot vacuum to WiFi opens up a world of convenience. With just your smartphone, you can start, stop, and schedule cleaning from anywhere. You can even link the robot to your smart home system. But if you’ve just bought a Shark robot, or you’re setting it up in a new home, the process can feel confusing. Many people run into problems, get stuck at different steps, or aren’t sure which app to use. The good news: connecting your Shark robot to WiFi using the app is simple if you follow the right steps. In this detailed guide, you’ll learn exactly how to connect any Shark robot to WiFi using the app, get tips for solving common problems, and understand what to do if things don’t go as planned. Even if you’re not tech-savvy or your English is not perfect, you’ll find clear instructions, real-life examples, and easy explanations here.
What You Need Before Starting
Before you start the connection process, it’s important to have everything ready. Missing any of these can cause problems or make the setup fail.
1. The Shark Robot Vacuum
Make sure your Shark robot is charged and ready. Plug it into the charging dock and wait until the battery is at least 20%. If the battery is too low, the robot might not connect.
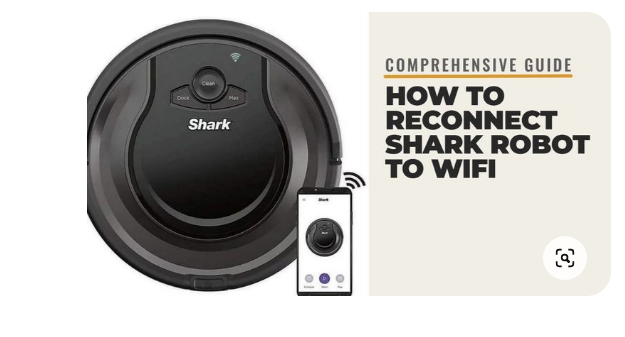
2. The SharkClean App
You need the SharkClean app to connect your robot to WiFi. Download it on your smartphone or tablet. The app is free and available for both Android and iOS.
- For iPhone users, get it from the App Store.
- For Android users, download it from Google Play.
3. WiFi Network Details
You must have the correct WiFi network name (SSID) and password. The Shark robot only connects to 2.4 GHz WiFi networks, not 5 GHz. If you’re not sure which you have, check your router or ask your internet provider.
4. Smartphone or Tablet
Your smartphone or tablet must be connected to the same 2. 4 GHz WiFi network you plan to use for your Shark robot. Make sure Bluetooth and location services are enabled if the app asks for them.
5. Stable Internet Connection
If your home WiFi is weak or drops out, the connection process may not complete. Try to set up the robot close to the router to get the best signal.
Step-by-step Guide: How To Connect Shark Robot To Wifi On App
Now that you have everything ready, follow these clear steps to connect your Shark robot vacuum to your WiFi using the app.
1. Download And Install The Sharkclean App
If you haven’t already done this, go to the App Store or Google Play and search for SharkClean. Install the app on your device. Once installed, open the app and allow any permissions it requests (such as Bluetooth, location, or notifications). These permissions help the app find and connect to your robot.
2. Create Or Log In To Your Shark Account
If you’re a new user, tap Sign Up and create a Shark account using your email and a password. If you already have an account, tap Log In and enter your details. This account lets you control your robot from anywhere and saves your settings.
3. Power On And Prepare Your Shark Robot
Remove your Shark robot from the dock if necessary and press the Power button to turn it on. Place the robot near your WiFi router for the best signal. Some Shark models have a WiFi or Dock & Clean button—check your manual if you’re unsure.
4. Reset Wifi Or Activate Pairing Mode
To connect the robot to WiFi, you may need to put it in pairing mode:
- For most models: Hold the Dock and Clean buttons together for about 5-10 seconds until you see a flashing blue or white WiFi light.
- Some models use a dedicated WiFi button. Hold it until the WiFi light blinks.
The blinking WiFi light means the robot is ready to connect.
5. Add Your Shark Robot In The App
In the SharkClean app, tap the Add Robot or + icon. Follow the prompts to select your Shark robot model. The app may ask you to confirm the model based on photos.
6. Connect To Your Wifi Network
The app will ask for your WiFi details:
- Select your 2.4 GHz WiFi network from the list.
- Enter the correct password. Double-check for typos.
- Tap Connect or Next.
The app may briefly ask you to connect your phone to the robot’s temporary WiFi (named something like “Shark_Robot_XXXX”). Follow the instructions to join this network, then return to the app.
7. Wait For The Connection
The app will now connect your Shark robot to the WiFi network. This can take up to 2 minutes. You’ll see a spinning wheel or progress bar. When it’s done, the WiFi light on your robot will turn solid (not blinking).
8. Name Your Robot And Finish Setup
The app will let you give your robot a name (like “Living Room Bot” or “Sharky”). You can also set cleaning schedules, see cleaning history, and adjust settings. Your Shark robot is now connected to WiFi.
Wifi Requirements And Common Problems
Many people get stuck because their home WiFi doesn’t meet the Shark robot’s needs. Here’s what you must know.
Supported Wifi Types
- 2.4 GHz only: Shark robots do not support 5 GHz WiFi.
- WPA2 encryption: Most home networks use this. Open networks (no password) or very old security types may cause problems.
Common Problems And Solutions
Problem: App can’t find robot or fails to connect.
Solution: Make sure your phone and robot are close to the router. Check that the WiFi light is blinking on the robot. Restart your phone, the app, and the robot if needed.
Problem: Wrong WiFi password.
Solution: Enter the WiFi password carefully. Even one wrong letter or space will cause it to fail.
Problem: Trying to use 5 GHz WiFi.
Solution: Make sure you select the 2.4 GHz network. Many home routers show both; choose the one labeled “2.4G” or similar.
Problem: Robot is too far from the router.
Solution: Move the robot closer during setup.
Problem: Network name (SSID) is hidden.
Solution: Make the WiFi network visible, or type the exact name manually.
Extra Tips For Success
- Restart your router if connections keep failing.
- Forget the WiFi network on your phone and reconnect.
- Check if your router has MAC address filtering. If yes, add the robot’s MAC address to the allowed list.
- If you have a mesh WiFi system, sometimes the robot picks the wrong band. Turn off the 5 GHz band temporarily during setup.
Supported Shark Robot Models
Most Shark robots from the last few years work with the SharkClean app. Below is a comparison of popular models and their WiFi features:
| Model | WiFi Support | App Control | Voice Assistant Support |
|---|---|---|---|
| Shark IQ Robot (RV1000) | Yes (2.4 GHz) | Yes | Yes (Alexa, Google) |
| Shark AI Robot (RV2000) | Yes (2.4 GHz) | Yes | Yes (Alexa, Google) |
| Shark EZ Robot (RV912S) | Yes (2.4 GHz) | Yes | Yes (Alexa) |
| Shark ION Robot (RV750) | Yes (2.4 GHz) | Yes | No |
Older Shark robots (before 2018) may not support the SharkClean app or WiFi connections. Always check the manual or the Shark website if you’re unsure.

Credit: www.youtube.com
Sharkclean App Features After Connecting
Once your Shark robot is connected to WiFi, you unlock many useful features in the app. Here are some of the most popular:
- Remote Start/Stop: Begin cleaning from anywhere with your phone.
- Set Schedules: Choose specific days and times for automatic cleaning.
- View Cleaning History: See when and where your robot cleaned.
- Change Cleaning Modes: Switch between eco, normal, or max modes.
- Receive Notifications: Get alerts for full dust bins, low battery, or errors.
- Map Your Home: Some models create maps you can view and edit in the app.
- Spot Cleaning: Direct the robot to clean a specific area.
Here’s a simple breakdown of app features by Shark robot series:
| Feature | Shark IQ/AI | Shark EZ | Shark ION |
|---|---|---|---|
| Remote Control | Yes | Yes | Yes |
| Cleaning Schedules | Yes | Yes | Yes |
| Mapping | Yes | No | No |
| Spot Cleaning | Yes | Limited | No |
| Voice Assistant | Yes | Yes | No |
Troubleshooting Connection Problems
Even after following every step, sometimes things just don’t work. Here are detailed solutions for the most frequent connection issues.
Robot Not Detected In The App
If the app can’t find your robot, try the following:
- Check that the robot’s WiFi light is blinking.
- Restart both your phone and the robot.
- Uninstall and reinstall the SharkClean app.
- Reset your router.
- Try a different phone or tablet if available.
Wifi Light Doesn’t Blink
If you can’t get the WiFi light to blink, you might not be holding the right buttons. Double-check your robot’s manual for the correct procedure. For most models, holding Dock and Clean together works. If not, try pressing and holding the WiFi button alone.
Connection Fails At 99%
Many users report the connection stopping just before completion. This usually means:
- Weak WiFi signal: Move the robot closer to the router.
- Wrong WiFi password: Try again and make sure there are no spaces at the end.
- Network interference: Turn off other devices using the same WiFi temporarily.
Can’t Connect To Robot’s Temporary Wifi
During setup, the app may ask you to connect to a WiFi network that starts with “Shark_Robot_…”. If your phone won’t connect:
- Forget other networks in your phone’s WiFi settings.
- Try enabling airplane mode, then turning WiFi back on (but not mobile data).
- Restart your phone.
Robot Disconnects After Setup
If your robot connects, then loses connection later:
- Check if your router changes WiFi channels automatically. Set it to a fixed channel (1, 6, or 11 for 2.4 GHz).
- Reduce the distance between the robot and the router.
- Avoid placing the robot near metal objects or thick walls.
Advanced Tips Most People Miss
- Dual-Band Routers: If your router has both 2.4 GHz and 5 GHz bands, the network names (SSIDs) should be different. For example, “HomeWiFi2.4” and “HomeWiFi5G”. If both have the same name, the robot may get confused. Rename them if possible.
- Guest Networks: Don’t use a guest WiFi network for your Shark robot. These usually have device isolation, which blocks the app from seeing the robot.
- VPNs and Firewalls: If your phone uses a VPN or the router has a strict firewall, temporarily disable these during setup.
- MAC Address Filtering: Some advanced routers block unknown devices by default. Find the robot’s MAC address (usually on a label underneath) and add it to your router’s allowed list.

Credit: www.reddit.com
Real-world Example: Connecting A Shark Iq Robot
Let’s walk through a real-life example to make things clearer.
Maria just bought a Shark IQ Robot (RV1000). She wants to connect it to her WiFi and use the app. Here’s what she does:
- Maria charges her robot and places it near her router.
- She downloads the SharkClean app on her Android phone.
- She creates a Shark account with her email.
- She turns on the robot and holds the Dock and Clean buttons for 10 seconds until the WiFi light blinks blue.
- In the app, she taps Add Robot, selects her model, and chooses her 2.4 GHz network from the list.
- She enters her WiFi password carefully.
- The app asks her to connect to the robot’s temporary WiFi. She follows the instructions.
- After about 1 minute, the app says “Success!” and the robot’s WiFi light turns solid.
- Maria names her robot “Sharky”, sets a cleaning schedule, and starts her first cleaning run from the app.
She’s surprised at how easy it is, but she did need to move her robot closer to the router during setup. Later, she adds the robot to her Alexa smart speaker using the app’s settings.
Comparing Shark Robot Connection To Other Brands
How does connecting a Shark robot to WiFi compare with other robot vacuums? Here’s a quick look at the process for Shark, iRobot (Roomba), and Roborock:
| Brand | App Required | WiFi Band | Setup Steps | Common Issues |
|---|---|---|---|---|
| Shark | SharkClean | 2.4 GHz | 8-10 steps | Dual-band WiFi confusion, app permissions |
| iRobot (Roomba) | iRobot Home | 2.4 GHz & some 5 GHz | 6-8 steps | Hidden SSID, WiFi password errors |
| Roborock | Roborock or Mi Home | 2.4 GHz | 8-12 steps | Region restrictions, app compatibility |
As you can see, the process is similar, but Shark robots are a bit stricter about WiFi compatibility. They do not work with 5 GHz networks, which is a common issue for new users.
How To Maintain A Stable Wifi Connection
After connecting your Shark robot, you want to keep it online for updates, scheduling, and remote control. Here’s how to make sure your connection stays strong:
1. Place the Dock in a Good Location
Keep the charging dock within 30 feet of your WiFi router. Avoid corners, thick walls, or metal objects that can block the signal.
2. Limit Network Devices
If too many devices are using your WiFi, your robot may lose connection. Try to limit active devices during cleaning times.
3. Update Your Router Firmware
Old router software can cause dropouts or slow speeds. Check your router’s settings and update if needed.
4. Keep the SharkClean App Updated
App updates fix bugs and add new features. Set your app to update automatically if possible.
5. Reboot the Robot and Router Occasionally
If you notice connection problems, restart both your robot and your WiFi router. This clears minor glitches.
Using Voice Assistants With Your Shark Robot
One of the best parts of connecting your Shark robot to WiFi is using voice assistants like Alexa or Google Assistant. Here’s how:
- Open the SharkClean app.
- Go to Settings and select “Voice Control.”
- Link your Shark account with your Alexa or Google Assistant.
- Use simple commands like “Alexa, ask Shark to start cleaning” or “Hey Google, tell Shark to dock.”
Some robots may need a firmware update for voice control. Make sure your robot is online and check for updates in the app.
Credit: medium.com
Security And Privacy Tips
Connecting a device to your home network always brings up questions about security. Here are some simple tips:
- Change your WiFi password regularly.
- Only use the official SharkClean app from the App Store or Google Play.
- Don’t share your Shark account password with others.
- Keep your robot’s firmware up to date. Updates often fix security bugs.
- Disable remote access in the app if you’re worried about privacy.
For more on smart home device security, check the official advice from the Cybersecurity & Infrastructure Security Agency.
Frequently Asked Questions
How Do I Know If My Shark Robot Is Connected To Wifi?
Look at the WiFi indicator light on your robot. If it is solid (not blinking), your robot is connected. You can also check in the SharkClean app. If you see your robot listed and can control it, the connection is working.
What Should I Do If My Wifi Password Changes?
If your WiFi password changes, your Shark robot will lose its connection. Open the SharkClean app, go to robot settings, and select Reconnect to WiFi. Follow the setup steps again with the new password.
Can I Connect My Shark Robot To Multiple Phones?
Yes, multiple people can use the SharkClean app with the same Shark account. Simply download the app on each device and log in with the same email and password. All users will see and control the same robot.
Why Won’t My Shark Robot Connect To 5 Ghz Wifi?
Shark robots only support 2.4 GHz WiFi. They cannot see or connect to 5 GHz networks. Make sure your phone and robot are using the 2.4 GHz band during setup.
What Happens If I Move To A New House Or Wifi Network?
You’ll need to reconnect your Shark robot to the new WiFi. Put the robot in pairing mode, open the SharkClean app, and follow the steps for a new WiFi setup. All cleaning schedules and settings may need to be re-entered.
Connecting your Shark robot to WiFi with the app might seem tricky at first, but once you know the exact steps and understand the common issues, it becomes easy. The extra features you get—like scheduling, remote control, and smart home integration—make the effort worthwhile.
If you follow this guide and pay attention to details like WiFi band, password, and app permissions, your Shark robot will be cleaning smarter in no time. Enjoy your cleaner home and the freedom of automation!
Brandy A. Cherney lovingly refers to herself as a cleaning geek, born and bred in South Carolina but moved to New York City to earn her B.A. in English. She is currently a wife, and mother of two children, two cats, and a dog. Brandy has always loved writing, but never thought she would write for a living.